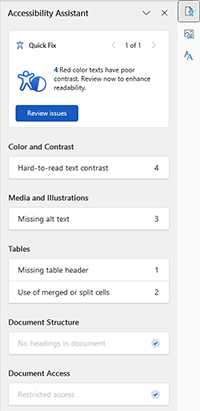
Accessibility Assistant
The Microsoft Office Accessibility Assistant helps to quickly identify and resolve many common accessibility issues such as missing alt text and tables without header rows.
Overview
The inspection results cover:
- Color and Contrast: indicate content where use of colours may make text difficult to read against the background.
- Media and Illustrations: indicates where images may be missing required text alternatives or other issues.
- Tables: Indicates issues with table structure and readiblity.
- Document Structure: Indicates if headings and other structural elements are correctly applied.
- Document Access: Verifies if the document can be accessed by systems such as screen readers.
Remember
The Accessibility Assistant is useful for scanning and reporting on many common problems. However it does not assess content and readability, along with other accessibility issues highlighted below. Heading relevance, images of text and other fundamental issues that need manual review.
Techniques
Launch the Accessibility Assistant
- Select Review, Check Accessibility, Check Accessibility.
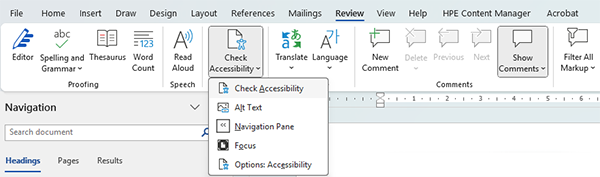
- Work through the quick fixes or select an area to jump to an issue in the document.
- Refer to Learn about Accessibility for more information or go to Improve accessibility in your documents with the Accessibility Assistant (Microsoft Support).
Related link
Make your Word documents accessible to everyone with Accessibility Assistant (Microsoft Support)
Text font, format and alignment
Avoid exessive use of formating by limiting the use of different fonts, capitalisation, bold, italics and underline.
Underlined text is generally used for hyperlinks, so should not be used for emphasis.
Colour should never be used to convey information as it can be difficult for people with colour-blindness to see and may not be announced by screen readers.
Also avoid the use of justified text, as it creates varying spaces between words which can be distracting for people with dyslexia and low vision. Left-aligned text is preferred.
Using multiple columns on a page can cause issues for people who navigate documents with their keyboard, as cursors may skip proceed from the first column to the next page, skipping the second column.
Users with low vision or dyslexia can also have trouble differentiating when one column ends and the next begins.
To convert text in multiple columns back into single columns, highlight the text, go to the layout menu and click on ‘columns’. Select ‘One’.
Headings
Overview
Use the document heading styles to create hierarchical heading levels. Heading styles are grouped in the Microsoft Word Home ribbon.
Screen readers can identify up to 6 heading levels – Heading 1 (H1) to Heading 6 (H6). Think of heading levels as ‘subheadings' that define content relationships.
Note: Headings should always be nested correctly. For example H1 followed by H2, H2 followed by H2 or H3, H3 followed by H4.
Only use heading styles for headings. Don't use it to visually format content that wouldn't make sense as a heading.
Techniques
Use true heading styles (not ‘fake' styles)
- Click in the heading text.
- Choose a heading style from the Home tab Styles group.

- Expand the Styles window if can't see the heading you're looking for.
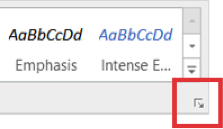
- To change the look of a heading, right click the heading style, and choose Modify.
Note: If you're modifying styles, take care to check colour contrast and stick to brand guidelines.
Related link
Add a heading in a Word document (Microsoft Support)
Numbered and bulleted lists
Like headings, lists allow screen reader users to quickly find and navigate through content.
Overview
There are two types of lists:
- ordered
- unordered.
Each list type is used in different circumstances.
Ordered list
Use ordered (numbered) lists when list items have a logical sequence – for example, recipe instructions.
- Heat butter in a frypan.
- Pour pancake mix into the pan.
- Flip pancake when bubbles appear.
Unordered list
Use unordered (bulleted) lists when list item order does not matter. For example, a wine list.
- Shiraz
- Cabernet Sauvignon
- Pinot Noir
- Merlot
Techniques
Implement numbered and bulleted lists
Use the numbered/bulleted list function in Word to make lists accessible instead of indenting and putting a dash or dot character.
- Choose a list style under Home in Paragraph.
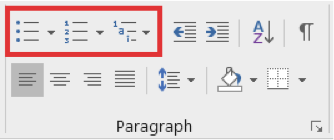
- Use the content style guide to ensure you're using the correct formatting.
Related link
Quick guide: lists (Australian Government Style Manual)
Blank lines
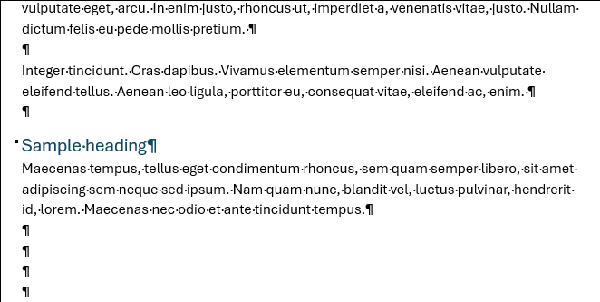
Use formatting, indenting, and styles to create white space instead of repeating paragraph marks (enter key). Repeated paragraph marks are announced as ‘blank’ in screen readers and in some cases can incorrectly suggest a document has ended.
Technique
Create paragraph spaces
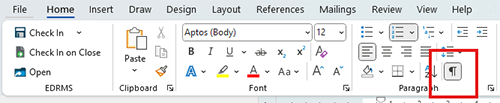
- View where paragraph marks have been used by clicking the show/hide button in the ‘home’ toolbar:
- Review the document looking for repeat paragraph marks eg:
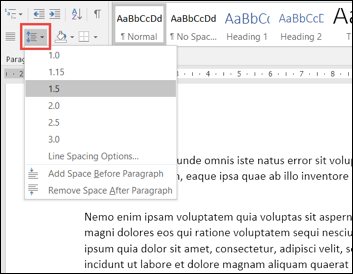
- Use the Line Spacing Options under Home to increase space between lines, or right click in the text and select ‘Paragraph’. Use the Line Spacing Options under Home to increase space between lines, or right click in the text and select ‘Paragraph’.
Insert a page break
- Add a Page Break (under Insert) to jump ahead to a new page.

Related links
Image placement
Screen readers often ignore floated images in Microsoft Word. In this example, where an image is floated to the right of text, a screen reader user won't even know the image is there. Example:
Lorem ipsum dolor sit amet, qui omnesque detraxit no, an duo periculis temporibus, dolore persius nam te.
Mel reque referrentur ei, quot disputando pri eu. Solum menandri praesent mei at. Vis perpetua intellegam eloquentiam ei.

For a screen reader to announce your images' alt text, you must place them in line with text.
Technique
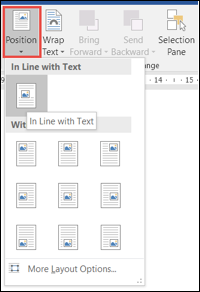
Wrap informative images in line with text
- Select the image.
- From the Picture Tools tab choose Position, In Line with Text.
Note: You can use floated images if the final format of the document is a PDF as floated images are announced in PDFs. However, you must ensure screen readers announce them in the correct location on the page.
Images and text alternatives
Many readers rely on screen readers or Braille devices to announce alternative (‘alt') text or descriptive text for images. This alt text must convey the purpose for the image.
Overview
Images are divided into two broad types:
- Informative images need descriptive alt text.
- Decorative images should have alt text set to read 'decorative'.
How to write alt text for informative images
Informative images convey information beyond page text. The content wouldn't be complete without these images. To discover their purpose, cover the image with your hand and read page content, or imagine someone is reading the document out to you. Is anything missing? This is what should be in the alt text.
Several types of images tend to be informative:
- photos
- logos
- images of text
- complex images.
Techniques
Add alternative text for informative images
- Right-click on the image.
- Choose View Alt Text.
- Enter a text description in the Description field.
Related links
- Five tips for Writing Alt-text (Vision Australia)
- Everything you need to know to write effective alt text (Microsoft Support)
- Alt text, captions and titles for images (Australian Government Style Manual)
Marking images as decorative
Descriptive images are usually visual elements such as background shapes or colour tints. They should only be marked as ‘decrative’ if they do not convey information.
- Right-click on the image.
- Choose View Alt Text.
- Tick the box ‘Mark as decorative’.
Complex images
Overview
Complex images, such as intricate graphs, charts, diagrams and maps, show more information than can be conveyed in a couple of brief sentences.
In these cases, text versions of the information can be created and included at the end of the document as an appendix or annex. The alt text for the image can include a brief description and direction such as ‘text version of this chart is available at …’. Data graphs can often be replicated in an accessible table format.
Note it is not sufficient for the alt text to simply say ‘pie chart indicating Australia’s imports by sector’, it should list the data.
Example:
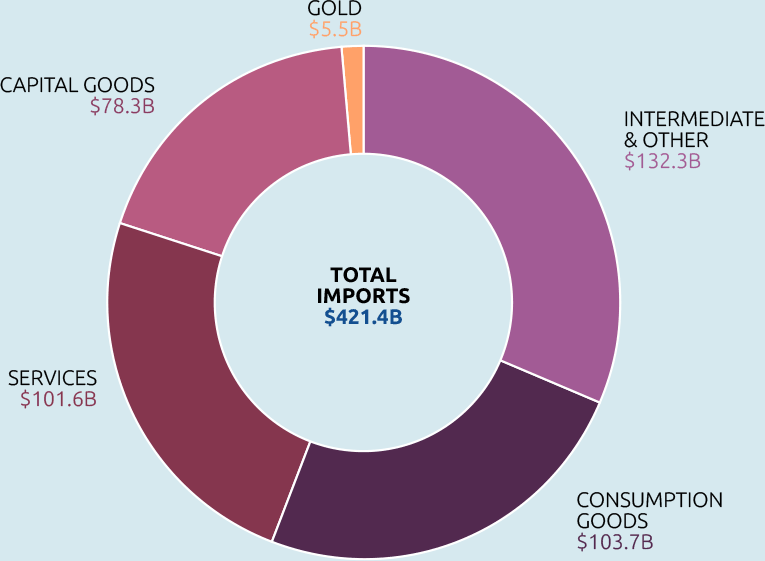
Alt text for the above image could be: ‘Pie chart of Australian ODA, Sri Lanka by Sector Group, 2024-25 budget estimate: 7% Agriculture, Trade and Other Production Sectors; 22% Economic Infrastructure and Services; 21% Education; 42% Governance; 1% Health; 5% Humanitarian; 2% Multisector and General Development Support.’
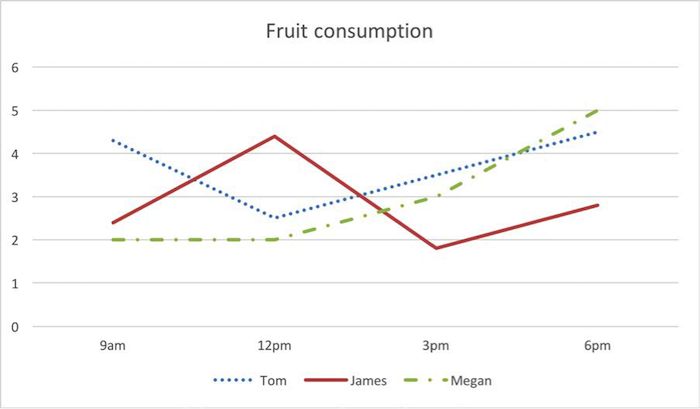
Data from more complex charts may be better presented as accessible tables.
Examples of ‘text versions’ of complex graphics:
- Text version of PCSP infographic
- Timor-Leste and Australia: Australia’s Development Impact in Timor-Leste
- Australia’s free trade agreement network
Convert Word chart, shapes and ‘smart art’ into graphics
Replicate as a flattened image
Word charts and Smart Art are complex, multi-layered graphics that you must flatten into a rasterised image – for example JPG, PNG or GIF – with a single layer of alt text.
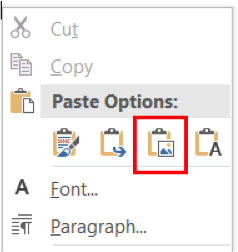
To flatten a chart:
- Click the outside edge of your chart.
- Choose Copy.
- Click elsewhere in your document.
- Right-click and choose Paste as picture.
Hyperlinks
Overview
A hyperlink can be either external (for example, it links to a website) or internal (for example, it links to a section or place within the document).
Use descriptive link text
Link text must describe the destination of the link. Good link text specifies this purpose when read in isolation from surrounding text. It should not replicate the link URL.
Avoid using ‘click here' or linking URLs (web addresses) as they are noisy and repetitive when read through screen readers.
Users of screen readers will often skip directly to links so it is important the link text is brief, includes key words and makes sense out of context.
Hyperlink web address (URL)
Show the URL when the document is likely to be printed or perhaps copied, and ideally add it as a footnote or endnote so that readers can choose to read it or not.
Create an external hyperlink
- Right-click on the text and choose Hyperlink.
- Choose Existing File or Web Page.
- Type or paste the destination URL in the Address field. Make sure you include the http:// or https:// part of the URL.

Note: When linking to a page or document in a secure area of a website, Word will bring up an error because it doesn't have the access the user does and it thinks it's a dead link. That's why it's important to include a footnote with the URL so staff members with access to the secure area can copy and paste the URL into their browser and log in as usual. It also helps users who print the document see the full URL.
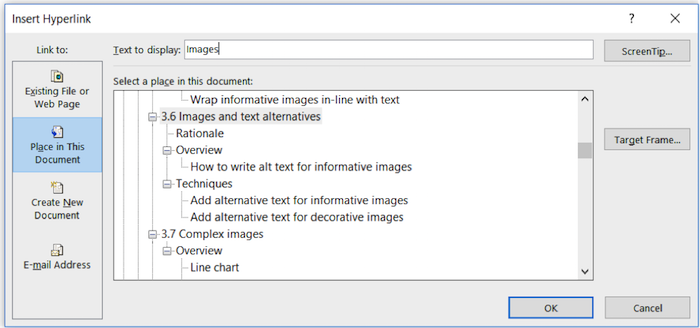
Create an internal hyperlink
- Right-click on the text and choose Hyperlink.
- Select Place in This Document.
- Choose the target heading (or Bookmark if included in document structure).
Related links
Data tables
Overview
Tables can cause major issues and confusion with screen readers if not formatted correctly.
Tables should be kept for presenting data or simple text. If tables are used for presenting long sections of text it may be better to reformat the content into bullet points with headings, or text with tabs or similar.Tables must not have split, merged or empty cells, and have clearly defined header rows that repeat if the table continues across a new page.
Avoid using cell or text colours to convey information, as this can be difficult for screen readers or users with colour blindness to read.
Complicated tables which include subheadings or rows of merged cells to break up sections are better displayed as separate, single tables, each with their own header row.
You must specify header cells so screen reader users can understand table data. There are three types of simple data tables:
- tables where the first row are headers.
- tables where the first column are headers.
- combination tables where both the first row and the first column are headers.
First row header table
The first row, going from left to right, contains table headers. The data table below illustrates column headers.
| Surname | First name | Location | Age |
|---|---|---|---|
| Smith | Peter | Sydney | 25 |
| Jones | Kylie | Bathurst | 27 |
| Miller | Jodie | Coffs Harbour | 22 |
First column header table
The first column contains the table headers. The data table below illustrates row headers.
| First name | Surname | Location | Age |
|---|---|---|---|
| Peter | Smith | Sydney | 25 |
| Kylie | Jones | Bathurst | 27 |
| Jodie | Miller | Coffs Harbour | 22 |
Column and row (combination) header table
Combination tables contain both column and row headers. The data table below illustrates column and row headers.
| Role | Surname | First name | Location | Age |
|---|---|---|---|---|
| Sales | Smith | Peter | Sydney | 25 |
| Marketing | Jones | Kylie | Bathurst | 27 |
| Administration | Miller | Jodie | Coffs Harbour | 22 |
Techniques
Choose a table style option
First row header table
- Click into the top left table cell.
- Click Design tab in Table Tools ribbon.
- Check Header Row.
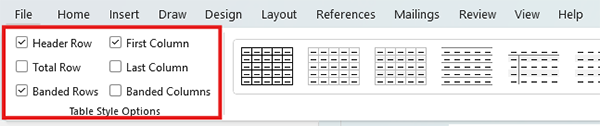
First column header table
- Click into the top left table cell.
- Click Table Design menu.
- Check First Column.
Combination header (for example, column and row) table
- Click into the top left table cell.
- Click Table Design menu.
- Check Header Row and First Column.
Repeat row headers
For 'first row header' tables and 'combination data' tables only (not 'first column header' tables), perform the following steps.
- Click into a cell of the first row.
- Right click and choose Table Properties, Row.
- Tick Repeat as header row at the top of each page.
Complicated tables
If tables contain additional header-rows part way through a table, or contain multiple topics or complex headers, it can be better to break the content up into separate tables.
Text boxes
Text boxes are ignored by screen readers in Word.
Technique
Don't use text boxes in Word documents. Instead, apply bordering effects to highlight content.
Show content within a box
- Select the content you want to display in a box.
- Go to Home then Paragraph.
- Choose Borders.
- Select Outside Borders.
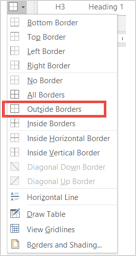
If the selection includes varying paragraph margins (for example in a bulleted list), Word will put each section in a different box. It may be more appropriate to use top and bottom borders rather than outside borders to separate this text.
Table of contents
A Table of Contents (TOC) contains links to document content. These links are particularly helpful for readers with physical and visual impairments when navigating long documents.
Technique
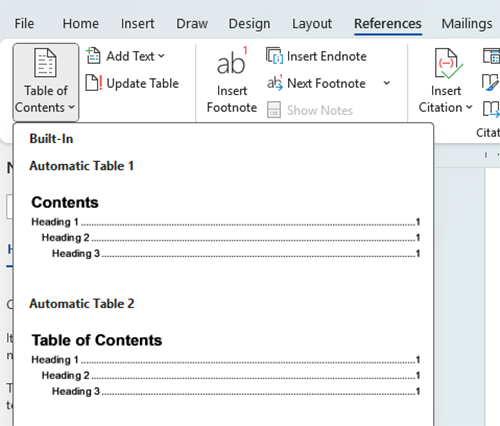
Insert a table of contents
- Check that document headings are hierarchical and consistent.
- Select References, Table of Contents.
- Choose a TOC style.
To update the table, click inside the table of contents panel, and select ‘update table’. Select from ‘update page numbers only’ or ‘update entire table’ as appropriate.
Related link
Insert a table of contents (Microsoft Support)
Document properties
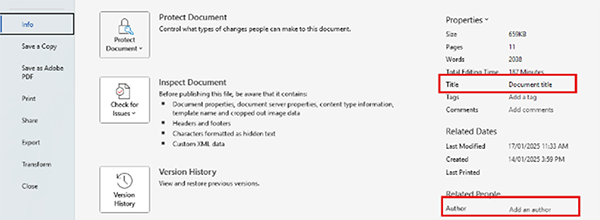
Readers who are blind or who have low vision rely on document metadata such as the document title and author. The title is the first element a screen reader announces when it opens a document. This is also useful for search engine optimisation.
It is also carried through when converting to a PDF.
Technique
Assign a brief, clear yet descriptive title to your Word document before PDF export.
Assign a title to a document
- Select File, then Info.
- Add a title to the document in the Title field. The author can also be updated.
Create PDF
The aim of this technique is to export Word document content to PDF while maintaining its structural integrity in the form of PDF tags.
Optimising the exported PDF for accessibility is covered in the next section.
Technique
Use Adobe Acrobat Pro's PDF Maker to export your document to PDF format. There are two ways to do this:
Create PDF from the Acrobat tab in the Ribbon
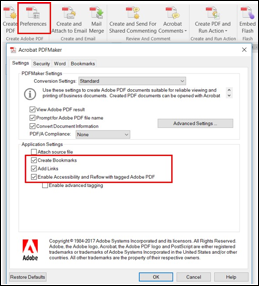
- Click Acrobat.
- Choose Preferences.
- Under Application Settings, verify that the following options are checked:
- Create Bookmarks
- Enable Accessibility and Reflow with Tagged Adobe PDF.
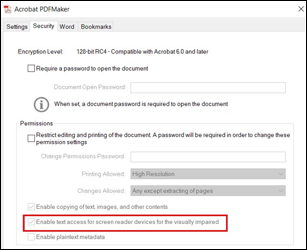
- In the Security tab, ensure that Enable text access for screen reader devices for the visually impaired is checked.
- Choose Create PDF, choose a file location and Save.
Export function to create PDF from Word
- Export function also retains accessibility features of word and converts heading tags to bookmarks in PDFs
- Go to the File menu, select Export and Create Adobe PDF
- Before selecting Save, check the Options settings have the following items checked:
- Convert document information
- Enable Accessibility and Reflow with tagged Adobe PDF
- Create Bookmarks (including Convert Word Headings to Bookmarks).